
How to Make the Perfect Thanksgiving Charcuterie Board
During the holiday season, I always volunteer to bring my favorite charcuterie boards to events and parties! My mother-in-law just requested that I bring one over on Thanksgiving, so I’m looking forward to recreating this one as an appetizer before our big meal together as a family! If you follow me on Instagram, then I’m sure you know making Charcuterie boards is one of my favorite things to do! I love creating them during each season and incorporating seasonal fruit, meat, and vegetables! Looking to create the most perfect Charcuterie board for thanksgiving this week? Keep reading - I’ll share some tips with you!
CHARCUTERIE
Let’s begin with the definition of Charcuterie (pronounced shahr-kyu-tuh-ree)! Charcuterie is by definition the art of preparing and assembling meats. But, many people (such as myself) use the term charcuterie to refer to an assortment of meats, cheese, fruit, and sauces. When considering what board you’ll want to use - anything goes! You can use anything from a wood cutting board (the one I’m using I picked up at Ikea), lazy susans, or large rounds with hands. Now, let’s talk about everything on the board!

CHEESE
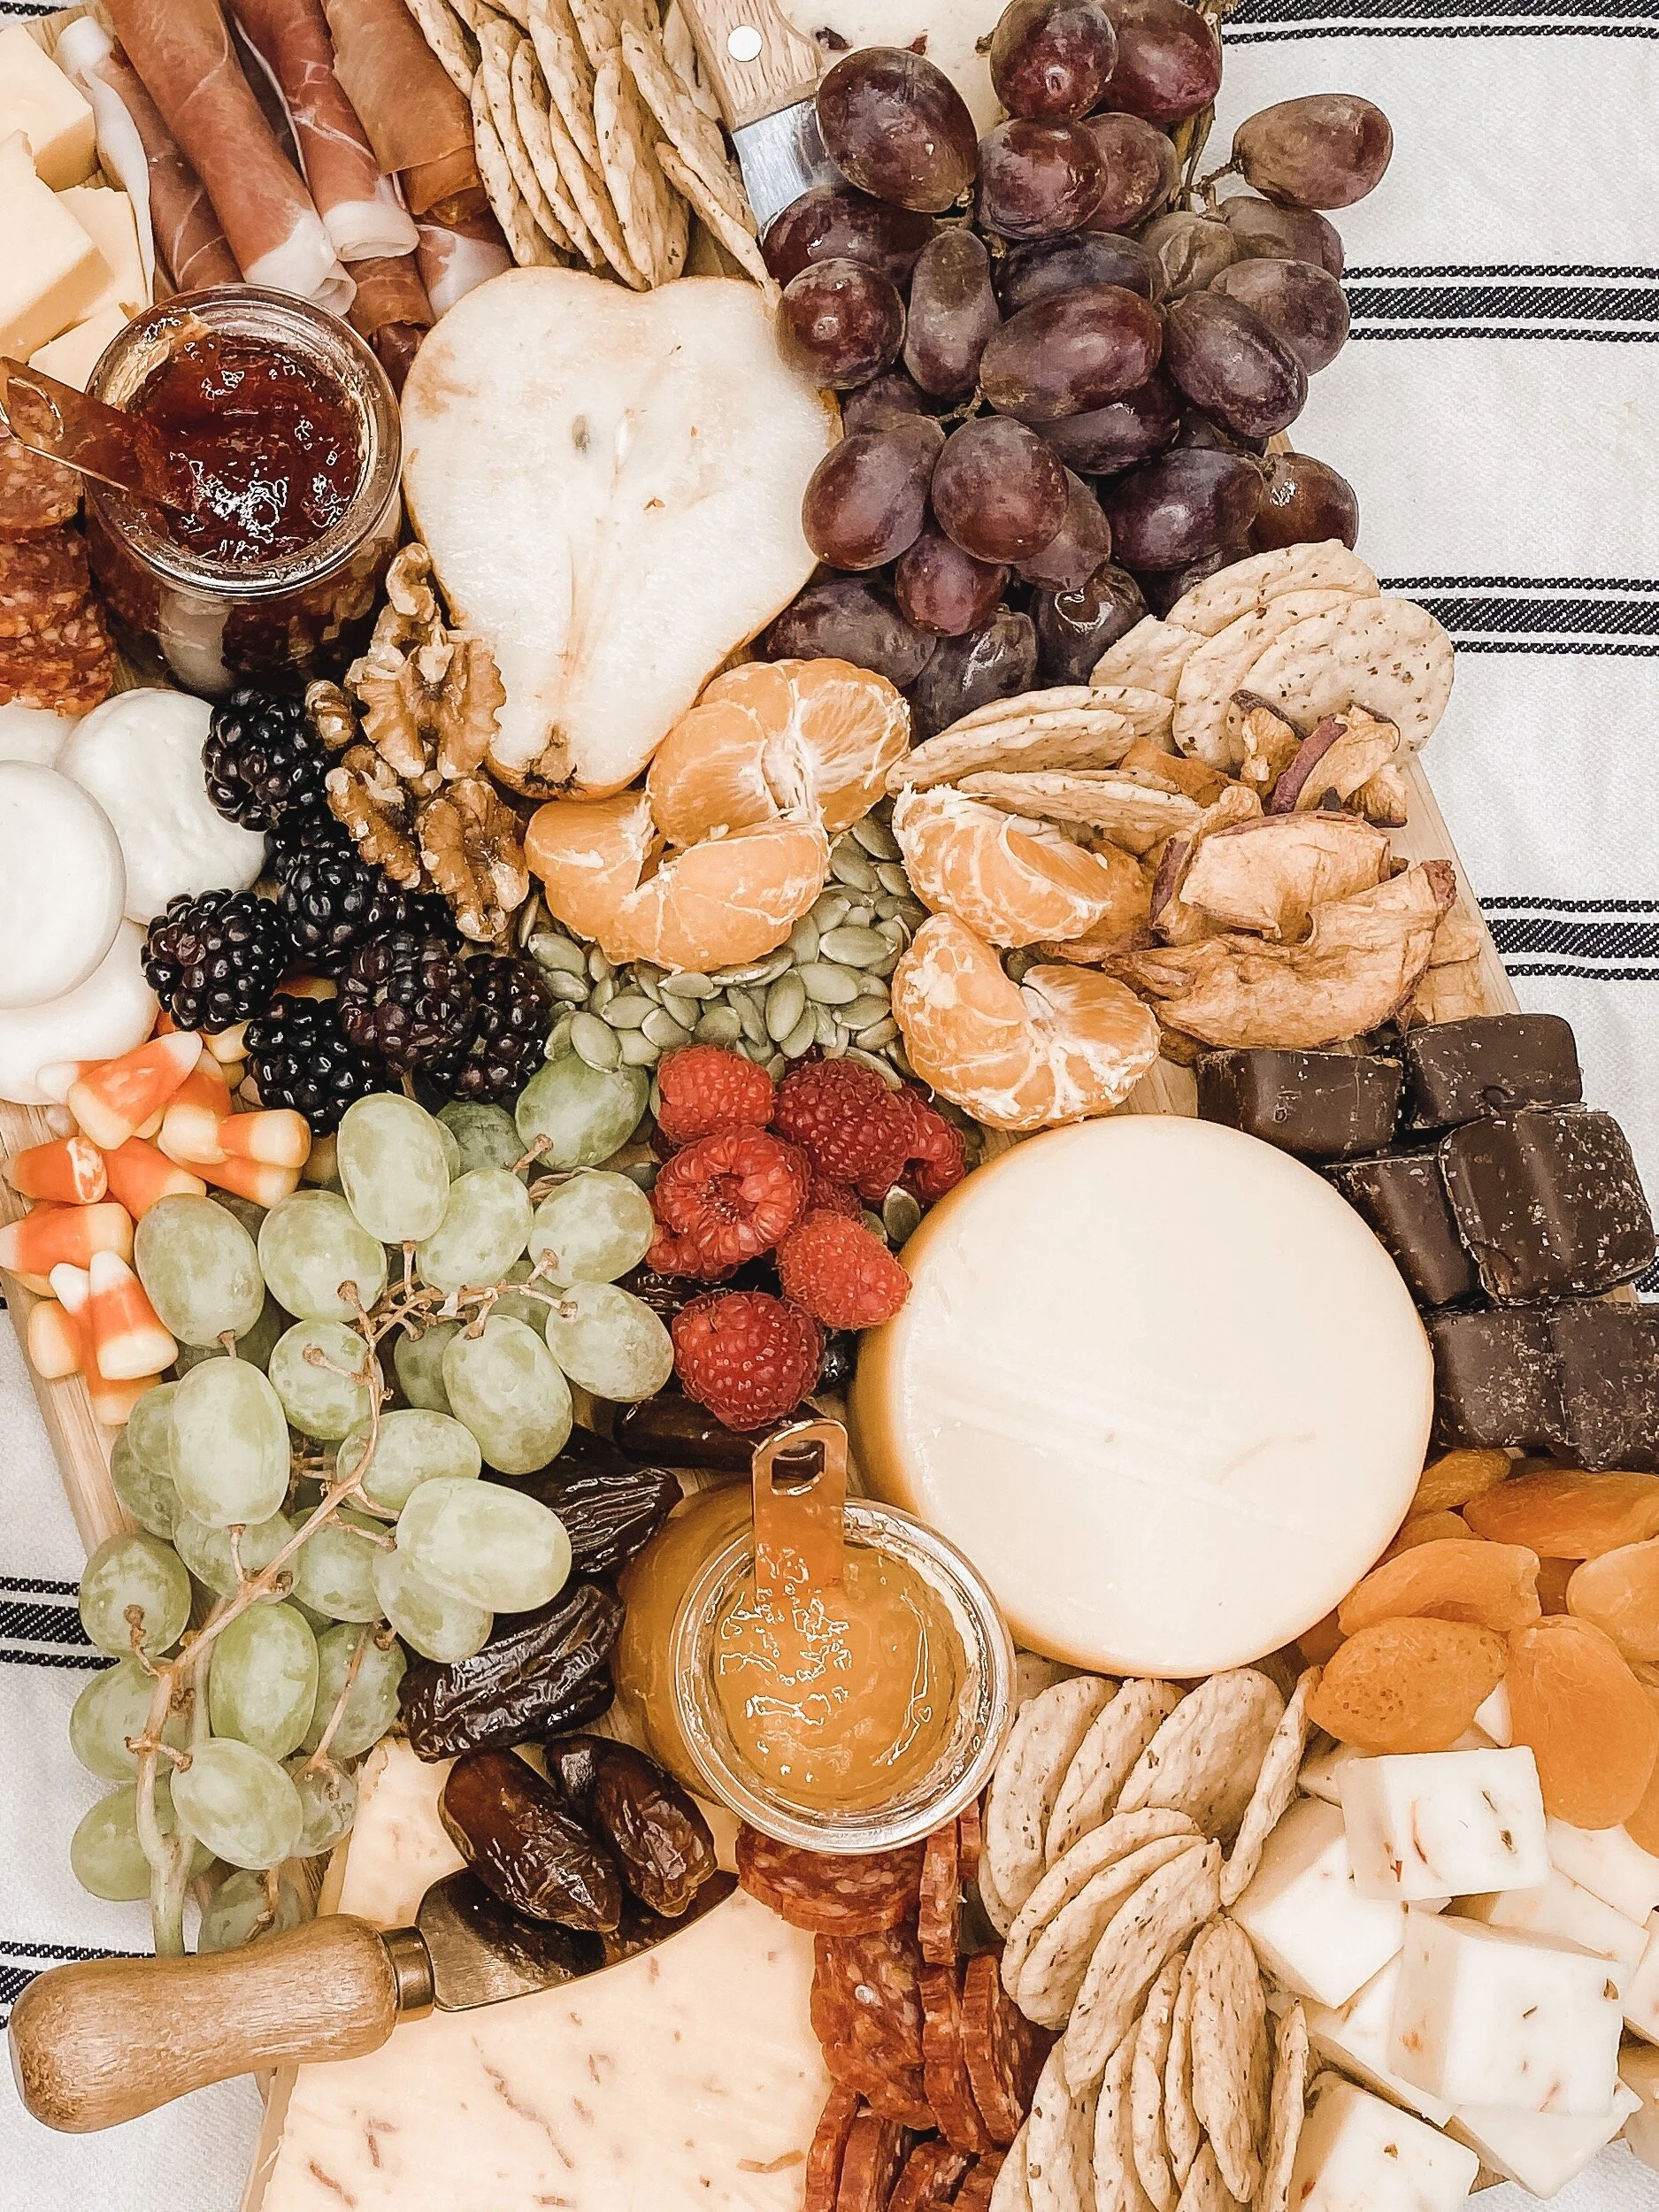
As I’m sure you might already know, nice cheeses and meats tend to be on the pricier side. BUT they feed a lot of people, so if the price is right, I go with it. I like to cut costs by picking up the nicer cheeses at Aldi and Wegmans to keep the price down. After purchasing the cheese and meat, you’ll probably find that you’ll have a handful of the other items that you’ll want to use in your very own pantry. Although it’s your choice what cheese you would like to use - I recommend having at least three different options on your board. Keep in mind my board was very large to feed a decent amount of people! I chose 4 different cheeses- from smoked gouda to pepper jack!

MEAT
Just like the cheese, you can choose whatever meat you would like! I went with some good quality pepperoni, salami, and prosciutto. Something that I normally do for my boards is put all of the meat together, so the flavor doesn’t spread to cheese. I would definitely recommend doing that for your next board!

FRUIT + NUTS
At this point, my board starts to come along nicely! Now that the meats and cheeses are arranged, I like to add some fresh raspberries, blackberries, grapes, oranges and an asian pear (just for fun!) to my board. I also added some dried dates and apricots to my board, and this would be a good time to add marinated olives and artichoke hearts if your guests would like those. You can find just about everything you need at your local grocery store. For nuts and seeds, I decided to go with walnuts and pumpkin seeds to bring a fall harvest feel to the board for Thanksgiving. I also added sweet and spicy jam in cute little jars and add some cheese knives to the board as well.

CRACKERS
I normally like to choose a number of different crackers for my charcuterie board, so everyone has there favorite! I absolutely love the garden flavored crackers, so I pick up those along with different shapes, flavors and colors. Look for rounds, rectangles, wheat, white….you get it! For this board, I went with a gluten free brand (Nut-Thins) so everyone in my family could enjoy. I normally add crackers at the very end to fill in all of the empty spaces.

What are your Charcuterie Board must-haves? Let me know in the comment section below!